
This is a very niche example I suppose, but the things I do can be used for other tasks too. None of the things I do are new or innovative either, but I spent some time setting this up for a colleague yesterday and figured I might as well blog about it.
We use CoreView at work. It’s a decent tool that can separate your M365 tenant into virtual tenants and assign different permissions to admins. It predates admin units so we’ve been using it a while at work. It’s more powerful than admin units in that when creating a virtual tenant we can use all sorts of criteria like “all groups ending with the word ‘(XYZ)’ and all users from the ‘xyz.com’ forest” to create a virtual tenant containing just these, and then assign its operators permissions to manage these. Can’t do that with admin units.
Anyways, one of things it can do is create reports.
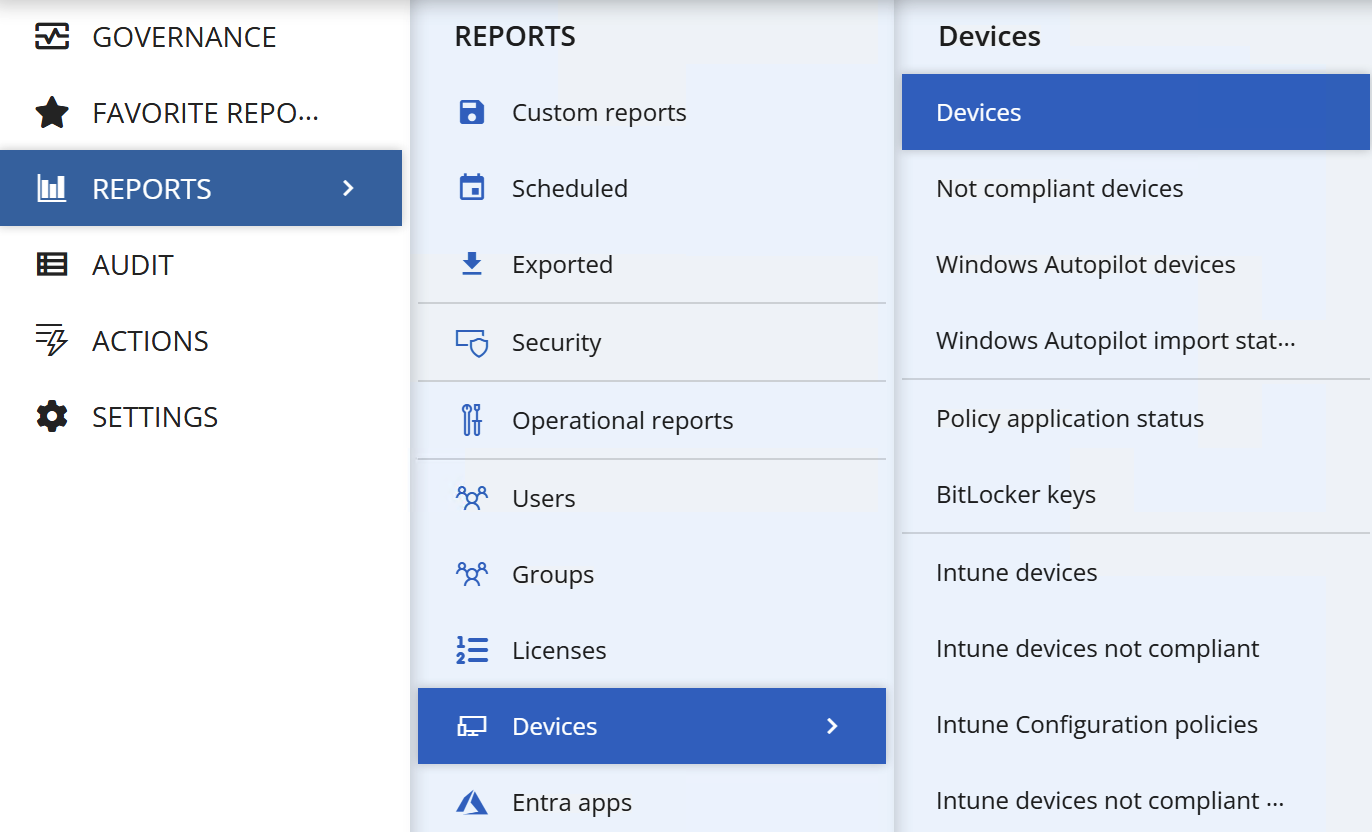
Very useful, because we can use it to see compliant devices, non compliant devices, and so on. And as a tenant admin all someone like me needs do is create separate virtual tenants like I said above, and an admin in one of the virtual tenants automatically sees a filtered view of these reports containing just the devices allocated to their virtual tenant.
The ask here was that admins of one of our virtual tenants wanted to dump this report elsewhere – like a SharePoint site or Power BI. It would have been good if we could ask them to get the data themselves, but things like Graph API permissions can’t be filtered to admin units or the like, so I’d have to take out the time to create some automation to make a report and send to them. Which I wasn’t keen on doing, coz one of the things I like to do is get out of the way of things as much as possible. 😊 If I can figure out someway of empowering someone else to do it themselves, that’s a job well done; instead of putting myself in the path wherein they have to keep contacting me for any changes to the report, or create new reports etc.
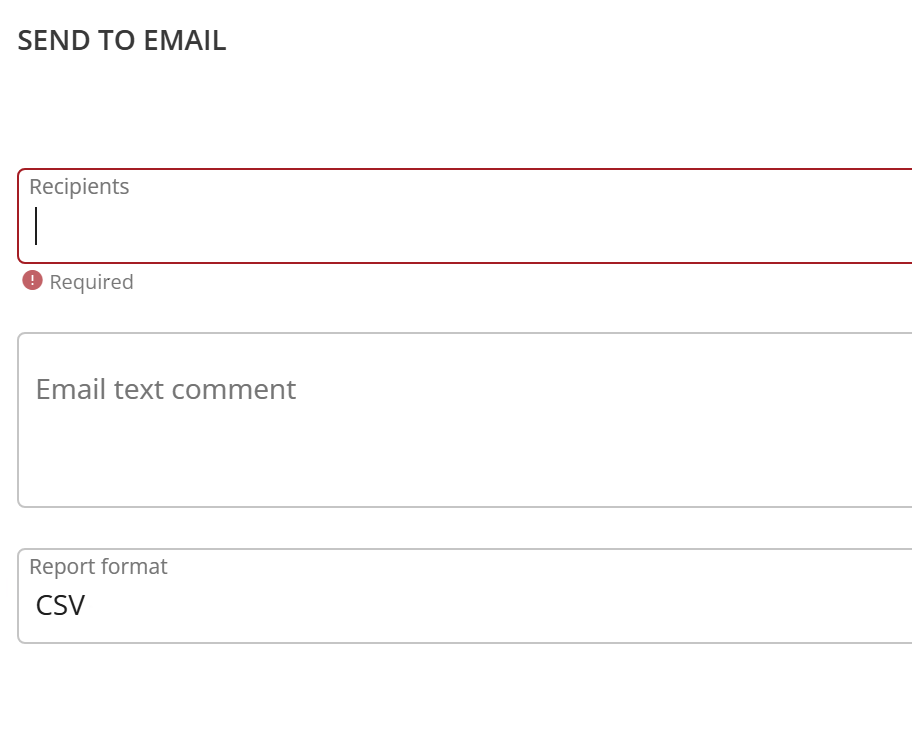
With CoreView, I (or and admin of the virtual tenant) can take an example report, modify it how they like with the needed columns etc., and then schedule an email.

When scheduling the report, they can specify an email address to send such reports to, and also the format of the report (e.g. CSV).
The result is an email that looks like this:
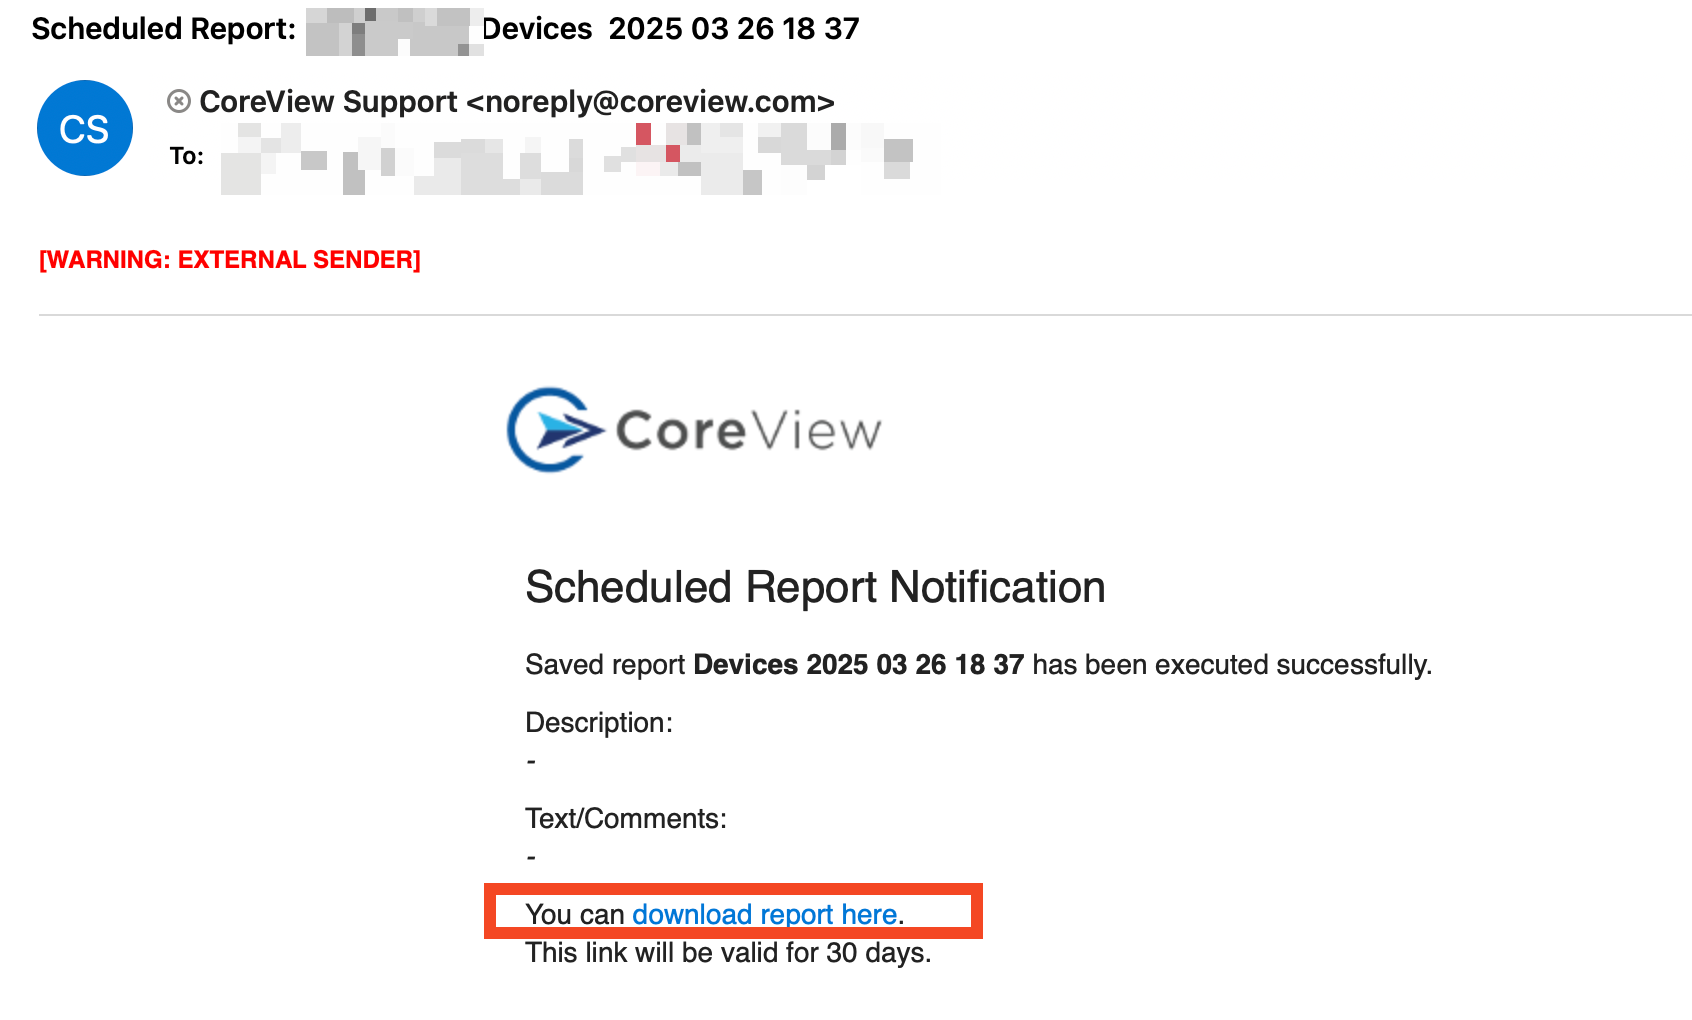
In theory, one could send this to a service account sort of mailbox, have Power Automate trigger on incoming mails to that mailbox, look for that sender and subject and download the report. Its unfortunate the report isn’t an attachment, so we’ll have to do some work to extract the URL.
Here’s an example URL: https://can01.safelinks.protection.outlook.com/?url=https%3A%2F%2Fwd123storageprod1.blob.core.windows.net%2Fexportreports%2F699d...45729.csv%3Fsv%3D2...reserved=0
It’s a CSV file in a storage account. There’s a shared access URL generated to it that’s valid for 30 days. This link is envolped in a SafeLinks URL in our case.
Here’s what I did in Power Automate.
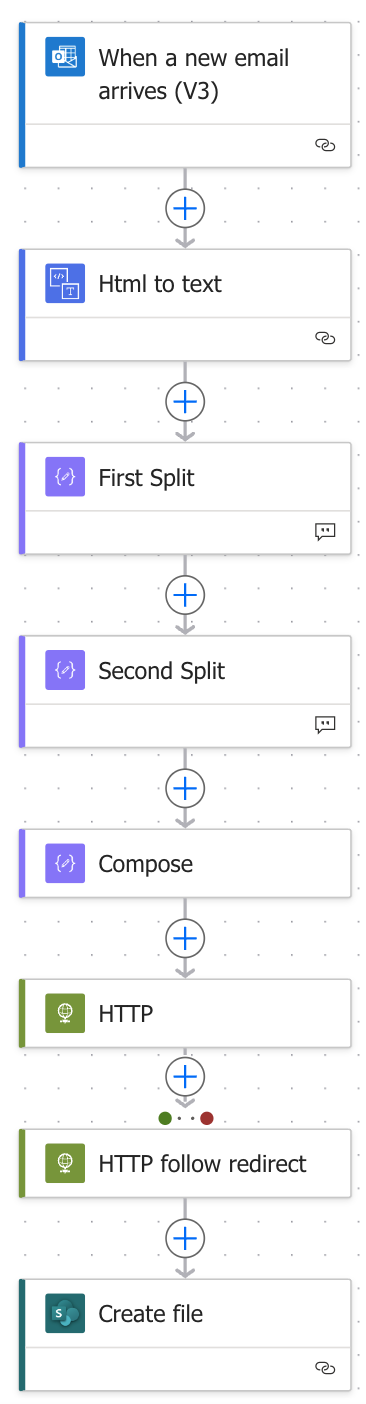
In terms of the big picture, this is what it does:
- The Power Automate is triggered when an email arrives.
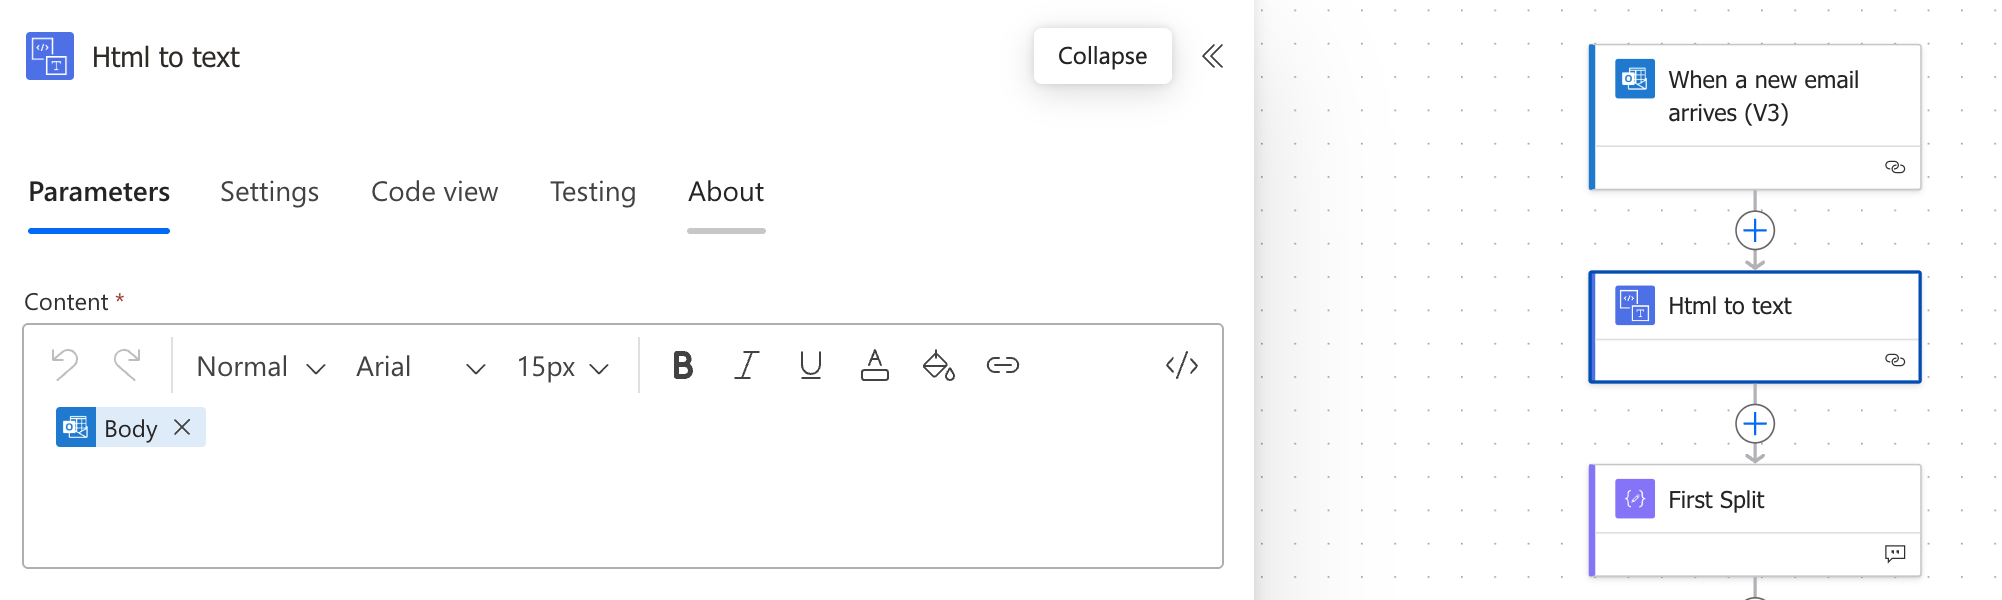
- We convert the body of the email from HTML to text.
- Then split couple of times and do some mangling to get the URL out.
- Then do an HTTP request. In my case this will redirect because of SafeLinks, but this won’t be the case for everyone. So I do a second HTTP request on the redirected URL.
- Dump the contents of the response from this second URL, into a file.
Here’s the details.
First, the trigger. Straight forward.

Then the conversion to text. Straight forward. It’s a Microsoft connector. Takes as input the body from the email.
As we know from the sample email, the link is in the “You can download report here” text. When converted to text, it looks like this:
|
1 2 3 4 5 6 7 8 9 10 11 12 13 14 15 |
SCHEDULED REPORT NOTIFICATION Saved report Devices 2025 04 10 15 49 has been executed successfully. Description: - Text/Comments: - You can download report here [https://can01.safelinks.protection.outlook.com/?url=https%3A%2F%2Fwd123storageprod1.blob.core.windows.net%2Fexportreports%2F699d8f0f0...8tRY%3D&reserved=0]. This link will be valid for 30 days. This is a system generated email and reply is not required. |
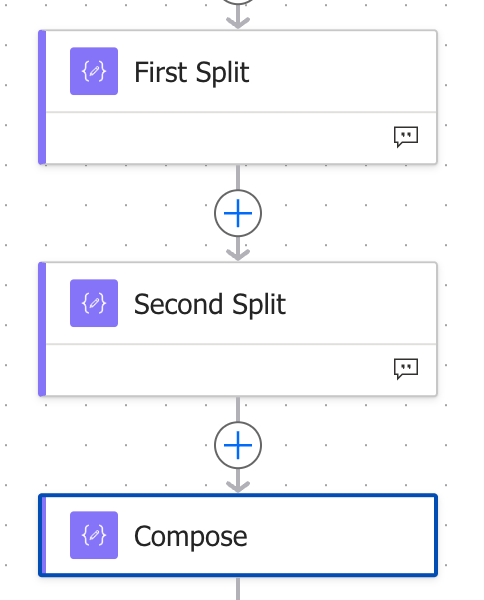
So an easy way to get the link out is to first split on the text “You can download report here”. This will give me two parts – one is the text above that, second is the text after that. Of these, the second part is what we are interested in.
So that’s the first split. It splits, and returns the second part (which is array index 1).
|
1 |
split(body('Html_to_text'),'You can download report here')[1] |
The second part will look like this:
|
1 2 3 4 |
[https://can01.safelinks.protection.outlook.com/?url=https%3A%2F%2Fwd123storageprod1.blob.core.windows.net%2Fexportreports%2F699d8f0f0...8tRY%3D&reserved=0]. This link will be valid for 30 days. This is a system generated email and reply is not required. |
Guess what I have to split on? “This link will be valid for 30 days.”
|
1 |
split(outputs('First_Split'), 'This link will be valid for 30 days.')[0] |
Split and take the first part of what comes out. Which looks like this:
|
1 |
[https://can01.safelinks.protection.outlook.com/?url=https%3A%2F%2Fwd123storageprod1.blob.core.windows.net%2Fexportreports%2F699d8f0f0...8tRY%3D&reserved=0]. |
Then get rid of the ‘[‘ and ‘].’ and you are left with the URL.
|
1 |
replace(replace(outputs('Second_Split'),'[',''), '].','') |
That’s what this section does:
The inputs to each of these are the code blocks I gave above.
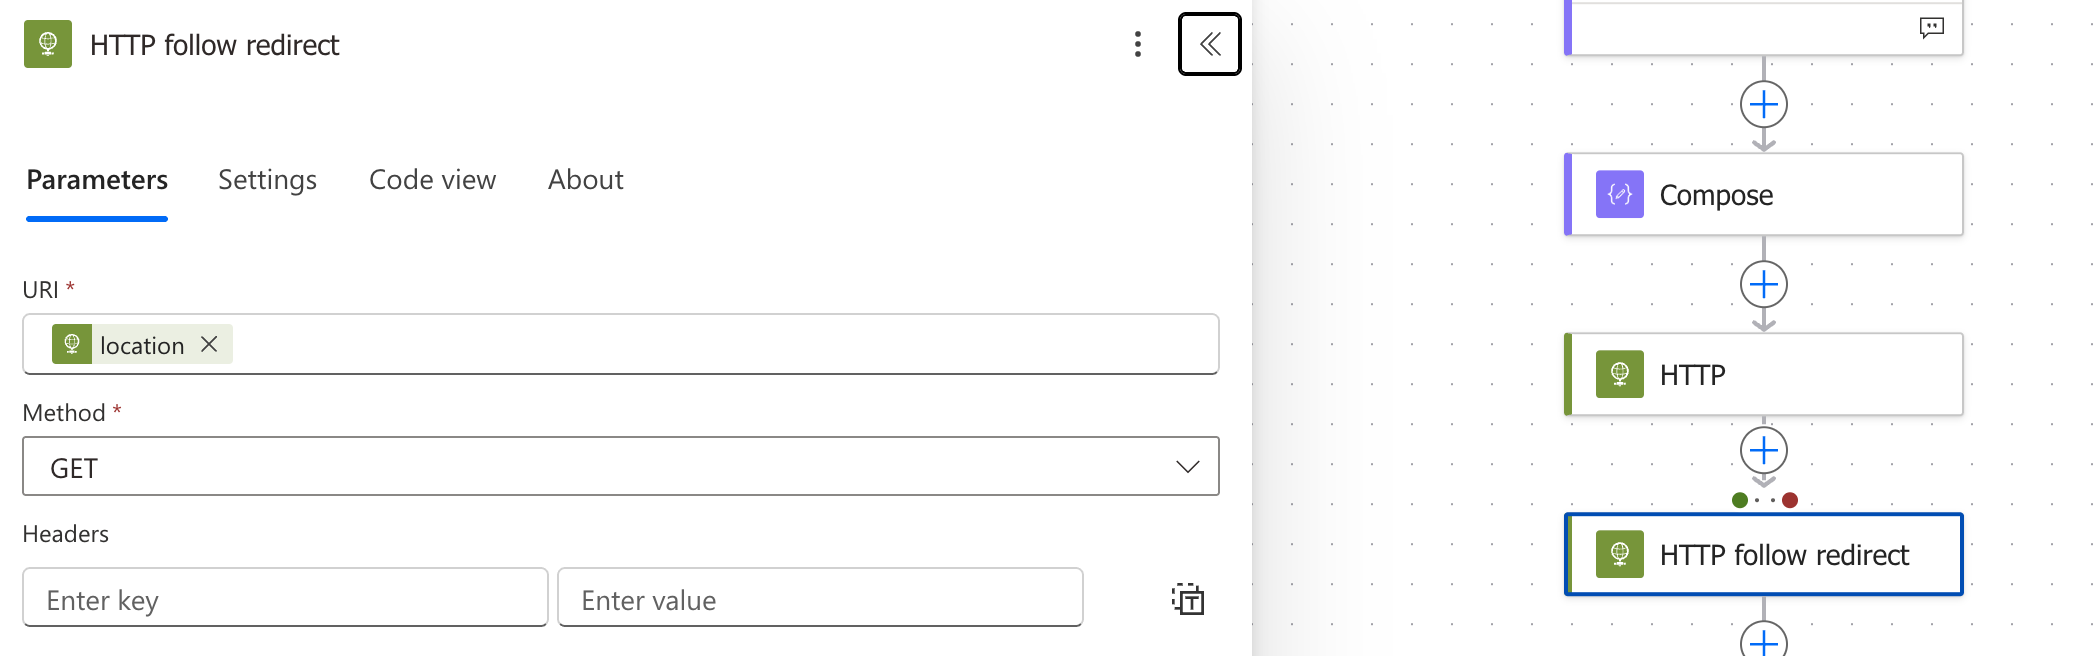
At the end of the Compose section, we have the URL. Get it via HTTP.
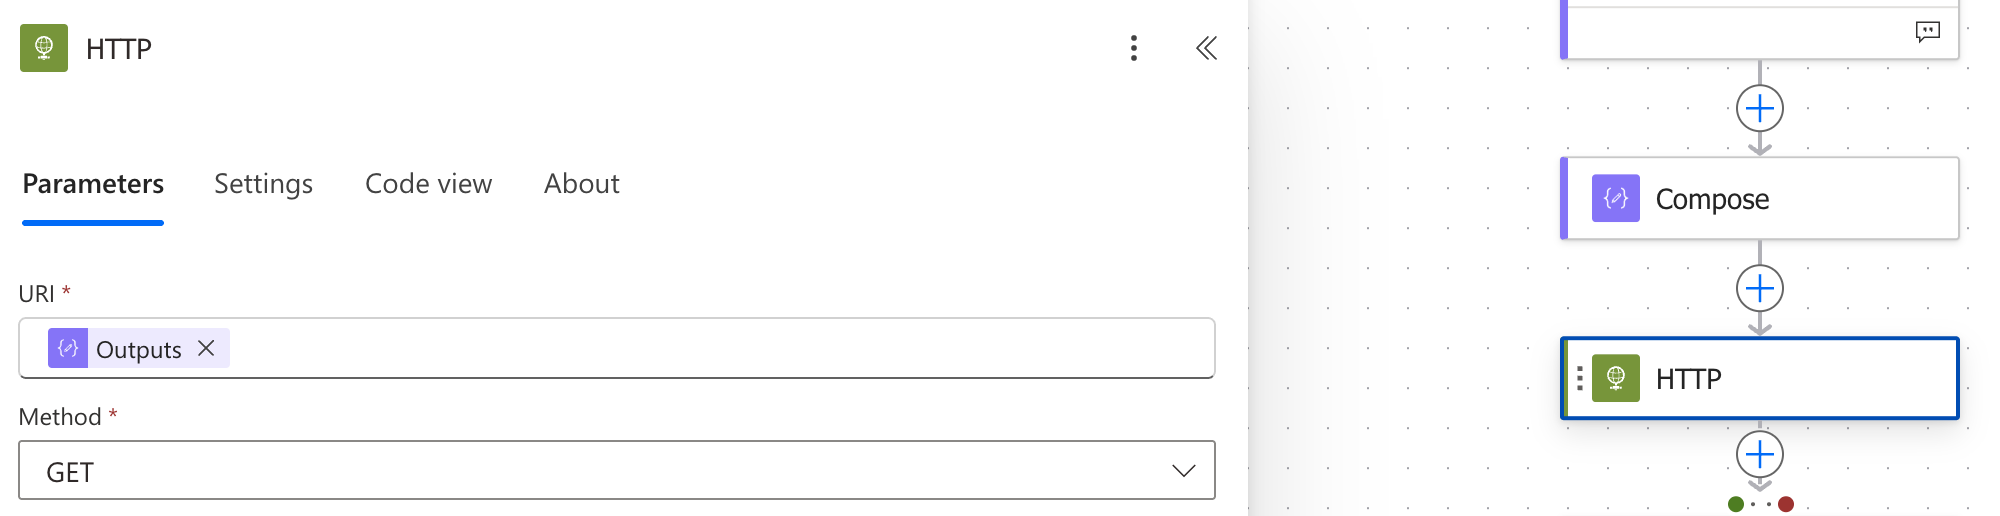
Now, if someone weren’t using SafeLinks, the result of this will be the CSV file. But in our case we use SafeLinks, so the result is a redirect which fails the HTTP connector.
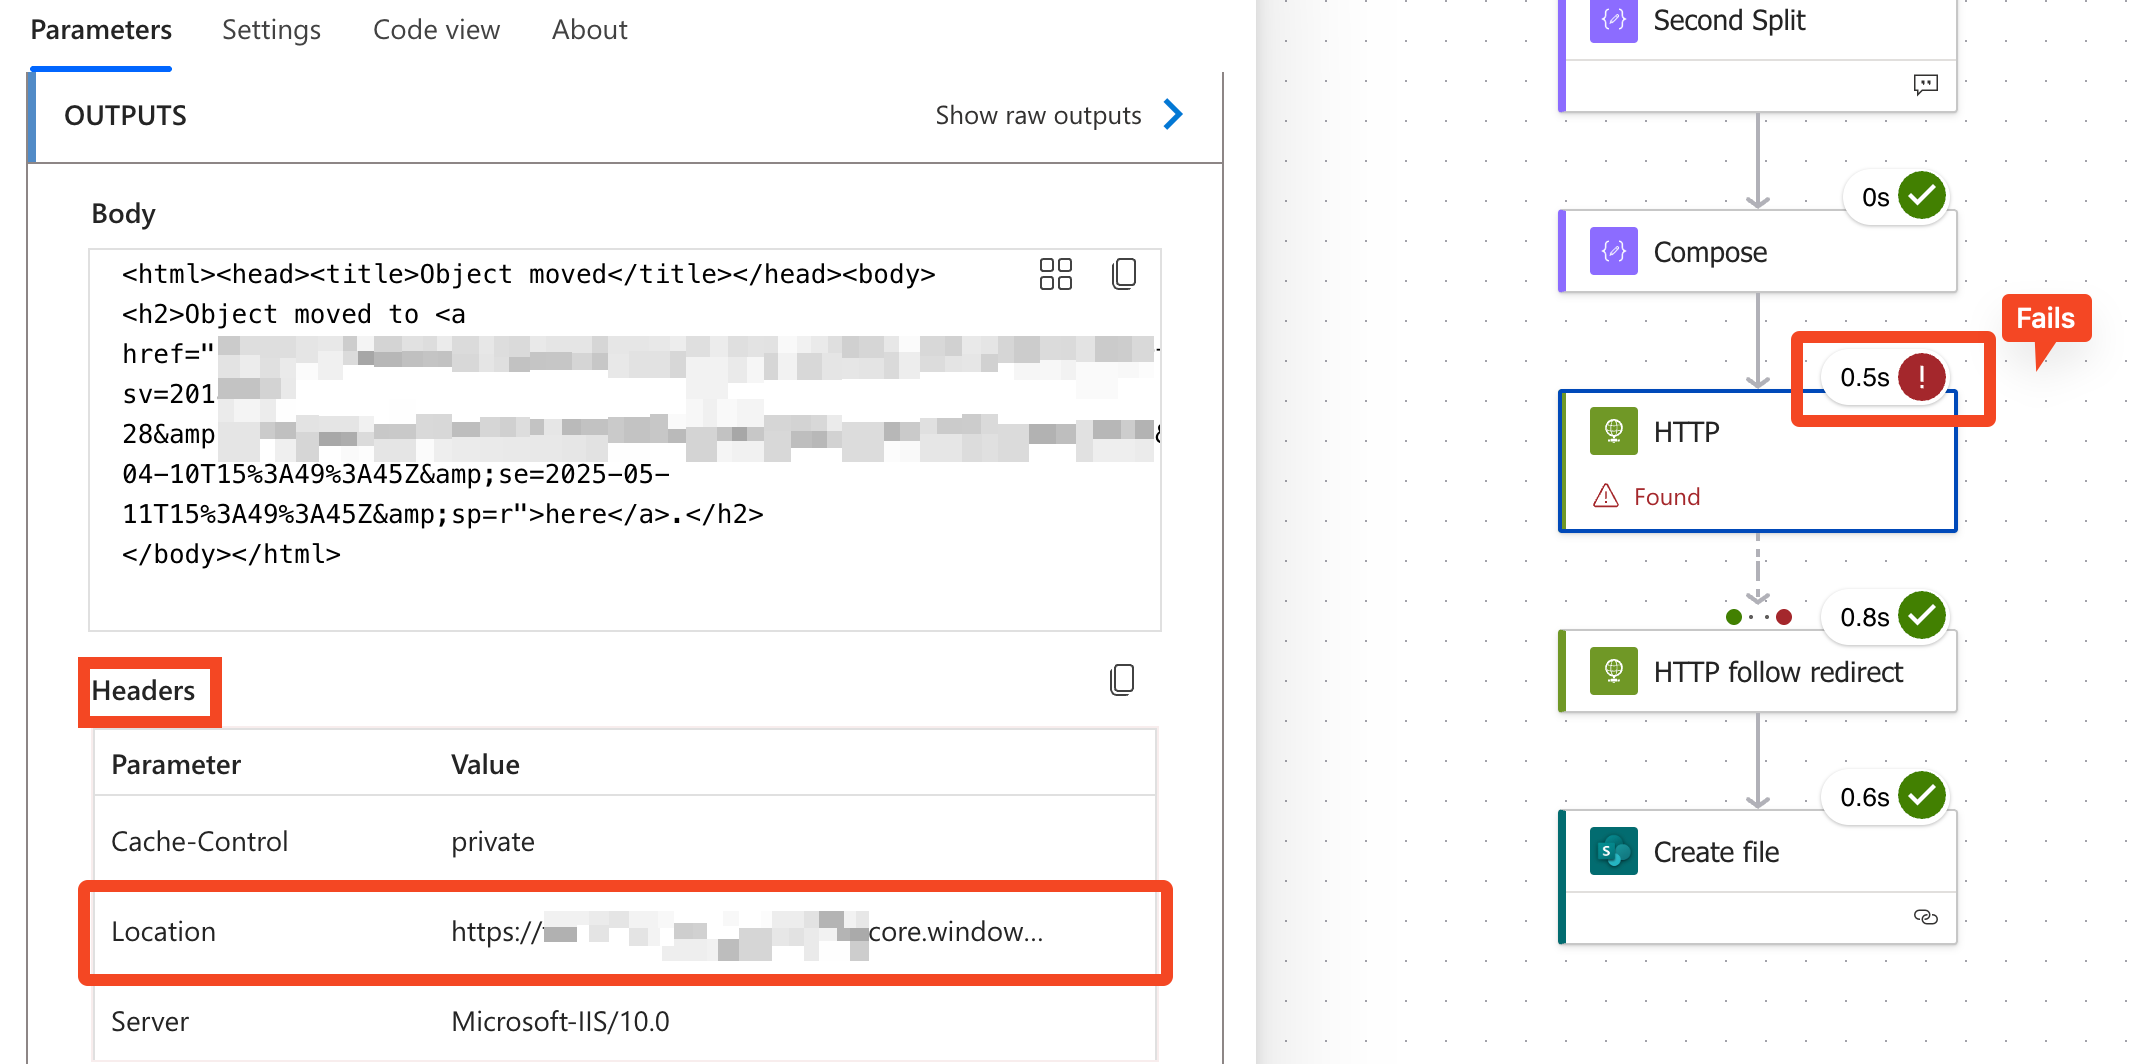
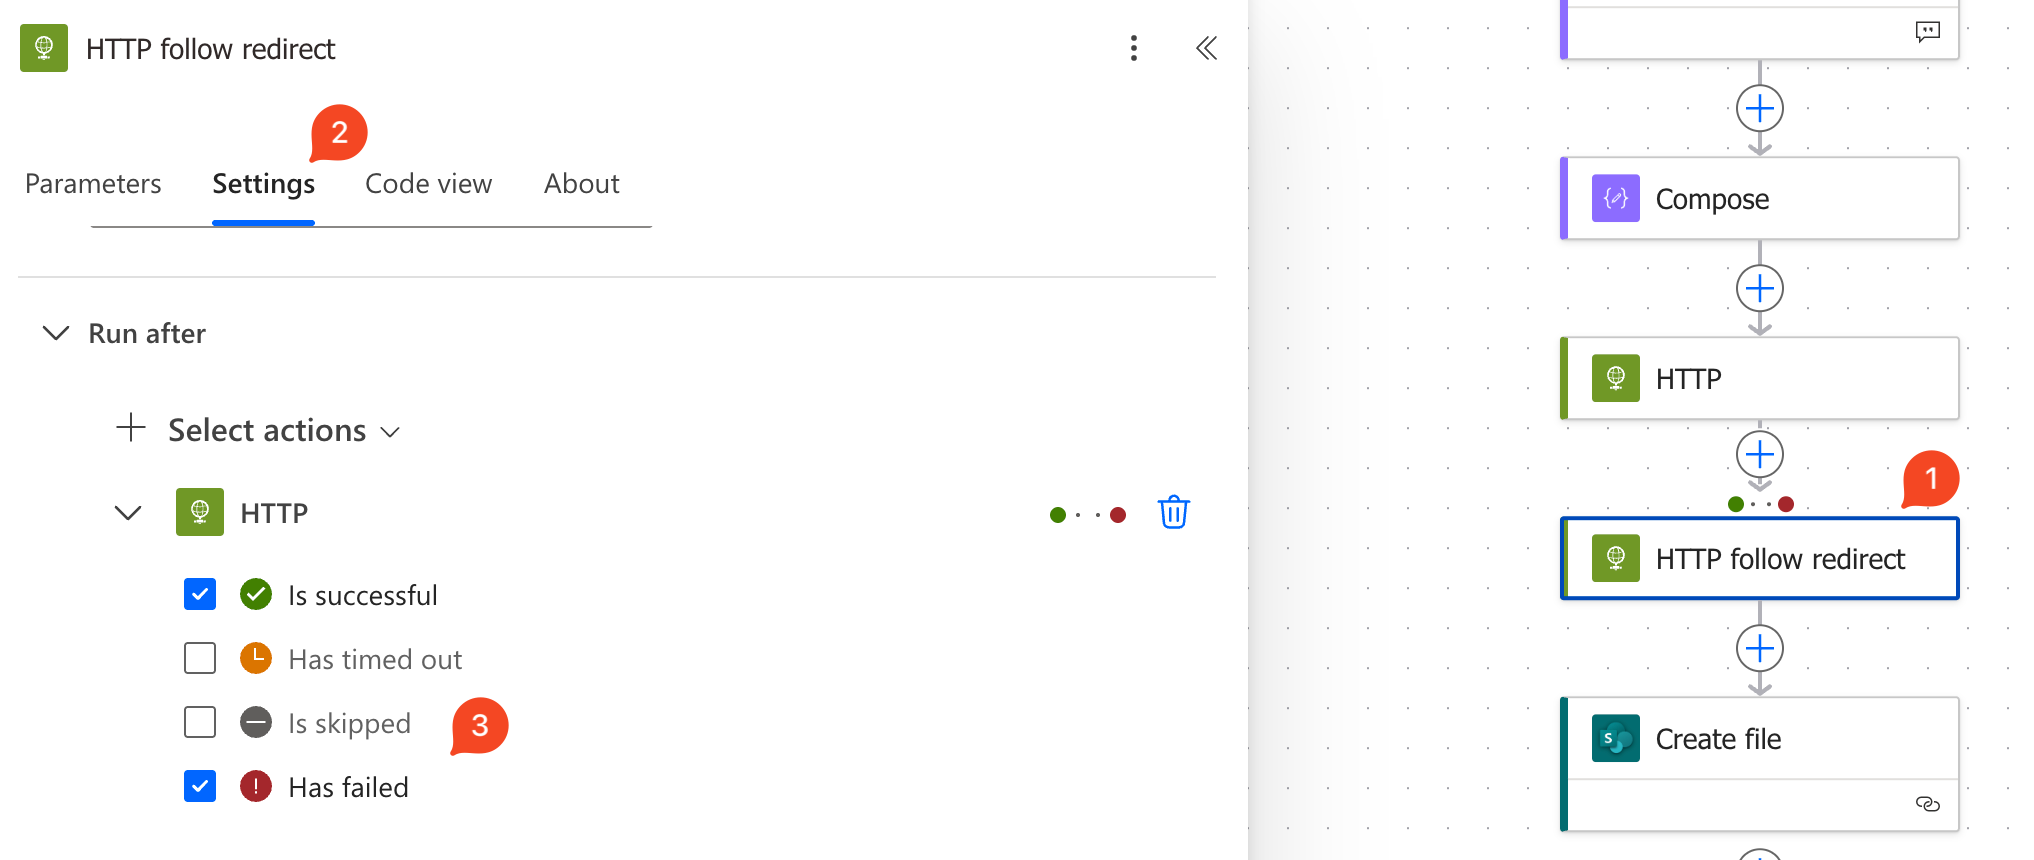
What I must do here is have a second HTTP connector that continues even after the first one fails, and it gets the new URL from the location field in the response headers.
The URL is:
|
1 |
outputs('HTTP')?['headers']['location'] |
(replace
HTTP with the name of the connector, if you change that)
And to ensure it runs in spit of the preceding HTTP failing:
Voila! At this point if you run it, the result of this connector looks something like this:
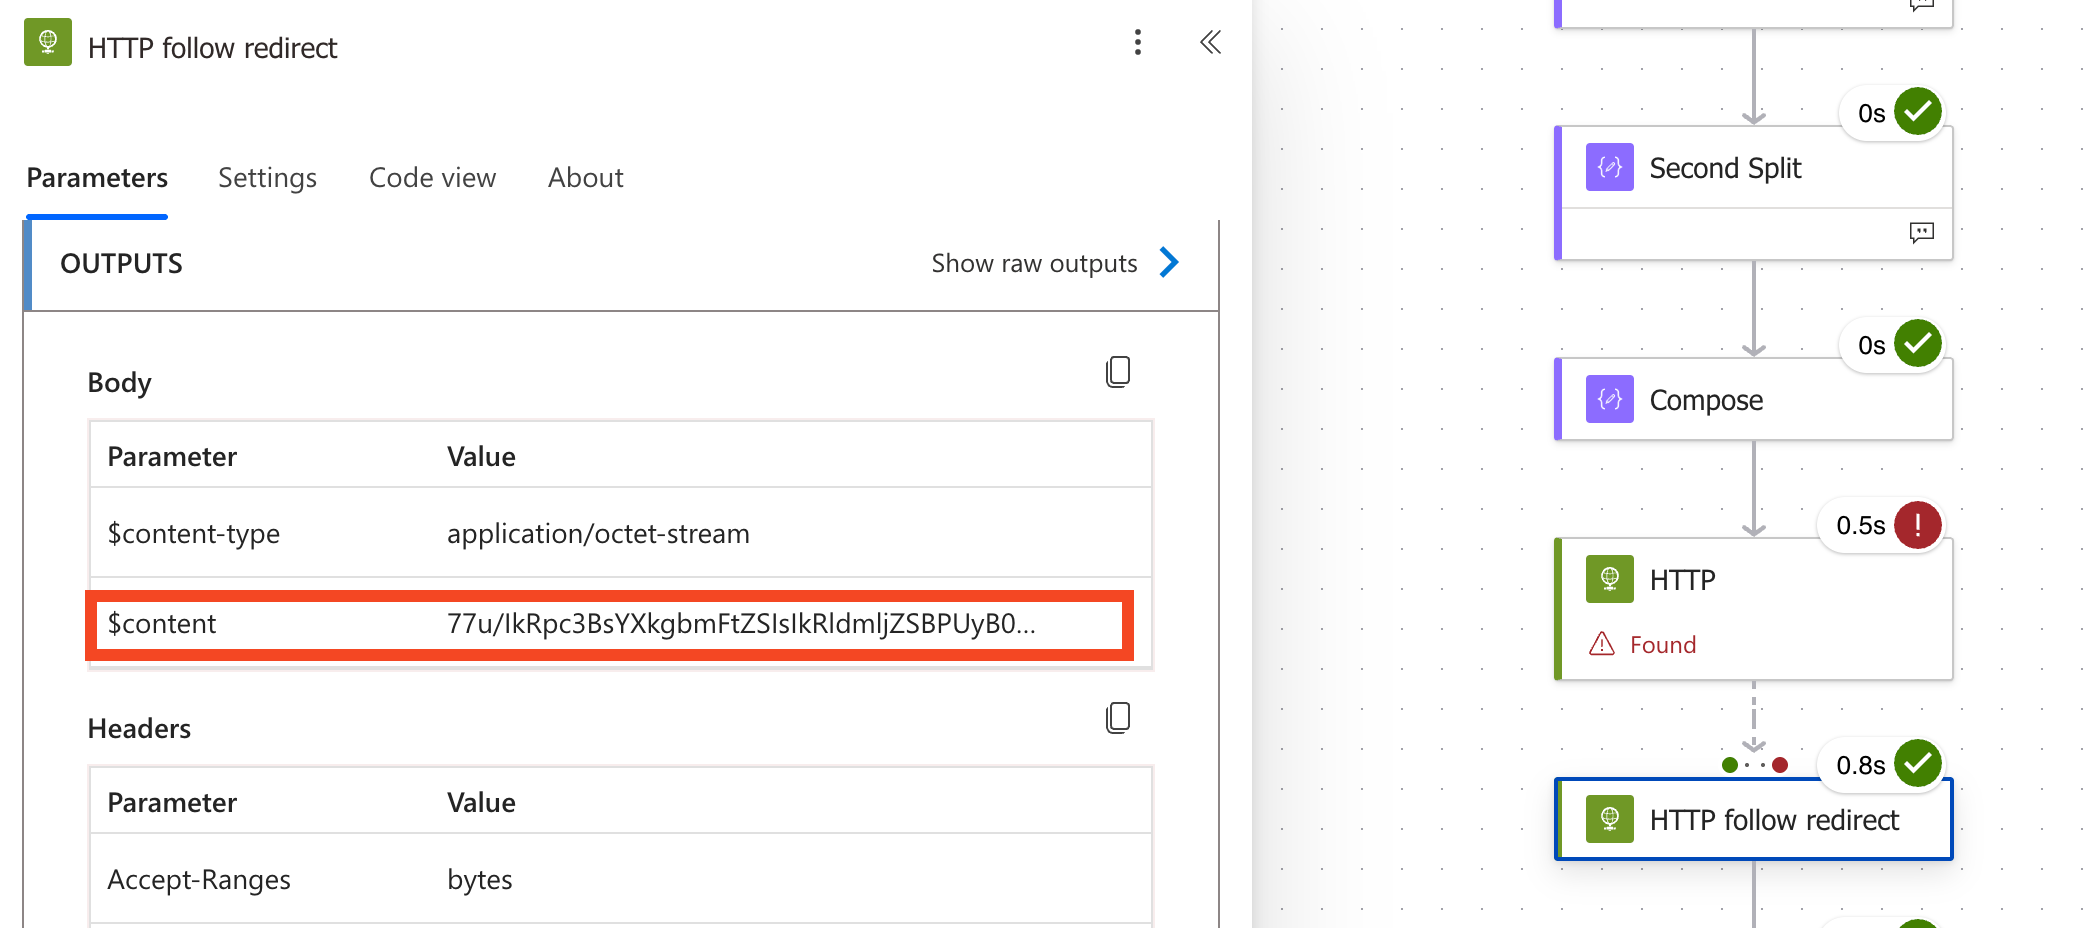
That’s the CSV file, in base64.
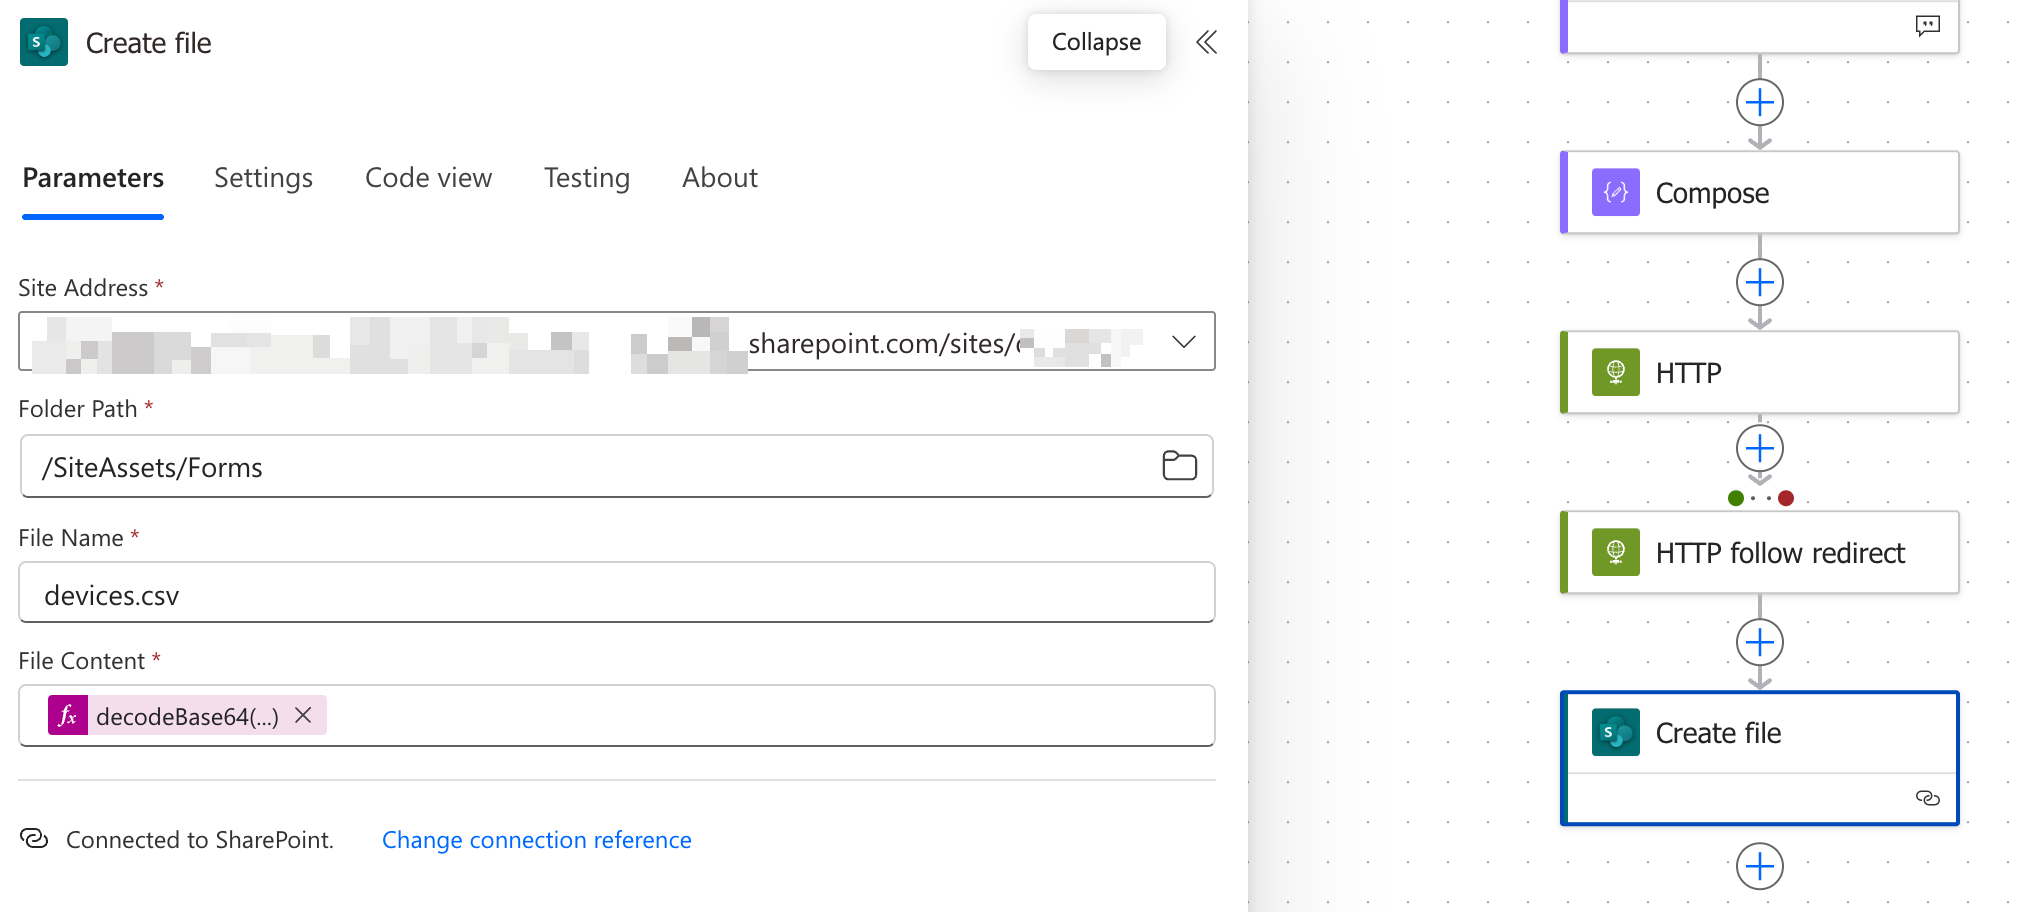
To keep things simple, I want to put this into a SharePoint site as an example. So I create a connector for that and:
|
1 |
decodeBase64(body('HTTP_follow_redirect')?['$content']) |
Simple? It’s the
$content property from the HTTP connector output, decoded. Important to put it in single quotes as '$content' because of the $ sign.
And that’s all really. Now if I run the file, and go to my SharePoint site I have a file whose contents are what CoreView sent me. Once I schedule this, and say have PowerBI or something point to this file as a data source I have a way of viewing this in Power BI and massaging the data as I wish. 😊 More importantly, as an admin I can give these instructions + an export of the Power Automate I created above to anyone else, and they have the power to generate such reports themselves without any input from me/ my team.